所需工具:一台带桌面环境的CentOS、一台纯净的服务器
先配置DHCP服务器:
yum -y install dhcp配置前需要说明的是,如果你是在虚拟机中实验,可能会出现找不到网口名称的情况。最好将网口绑定一个静态IP.
开始配置DHCP
vim /etc/dhcp/dhcp.conf以下为参考配置文件
DHCPDARGS="ens36"; #绑定网卡
ddns-update-style none;
ignore client-updates;
default-lease-time      259200;
max-lease-time 518400;
option routers  10.0.0.1;
option domain-name      "test.com";
option domain-name-servers 10.0.0.1;

subnet 10.0.0. netmask 255.255.255.0{
        range 10.0.0.100 10.0.0.200;
        next-server 10.0.0.1; #指定NFS服务器地址
        filename        "pxelinux.0"; #指定启动文件
}
设置dhcp服务开启自启
systemctl enable dhcpd
systemctl start dhcpd
安装并配置tftpd
yum -y install tftp-server
systemctl enable tftp
systemctl start tftp
修改配置
vim /etc/xinetd.d/tftp以下配置参考
service tftp
{
        socket_type             = dgram
        protocol                = udp
        wait                    = yes
        user                    = root
        server                  = /usr/sbin/in.tftpd
        server_args             = -s /var/lib/tftpboot #这里是tftp的文件目录,可根据情况修改
        disable                 = no #原本是yes,改为no,代表开启tftp服务
        per_source              = 11
        cps                     = 100 2
        flags                   = IPv4
}
复制所需文件到tftp目录下
yum -y install syslinux
cp /usr/share/syslinux/pxelinux.0 /var/lib/tftpboot/
mount -o loop /dev/cdrom /mnt
cp /mnt/isolinux/{vmlinuz,initrd.img} /var/lib/tftpboot/
mkdir /var/lib/tftpboot/pxelinux.cfg
cp /mnt/isolinux/isolinux.cfg /var/lib/tftpboot/pxelinux.cfg/default
chmod 644 /var/lib/tftpboot/pxlinux.cfg/default
修改启动配置文件
找到label check,大约66行,删除下面的make default
找到label linux,大约60行,在menu label ^Install Centos 7下面添加make default
找到default vesamenu.c32改为default linux
找到append initrd=initrd.img inst.stage2=hd:LABEL=CentOS\x207\x20x86_64 quiet修改为append initrd=initrd.img ks=nfs:10.0.0.1:/ks/ks.cfg
这是为了指定自动应答文件。
切换到桌面CentOS
安装并开始配置system-config-kickstart
yum -y install system-config-kickstart
system-config-kickstart在图形配置过程会出现packages selection is disabled due to problems downloading package information的错误提示,解决方法是在/etc/yum.repos.d目录下添加一个development.repo
配置如下,需要将centos的安装光盘文件挂载到/mnt下:
[development]
name=development
baseurl=file:///mnt
gpgcheck=0再次运行system-config-kickstart配置安装包的时候就不会报错了。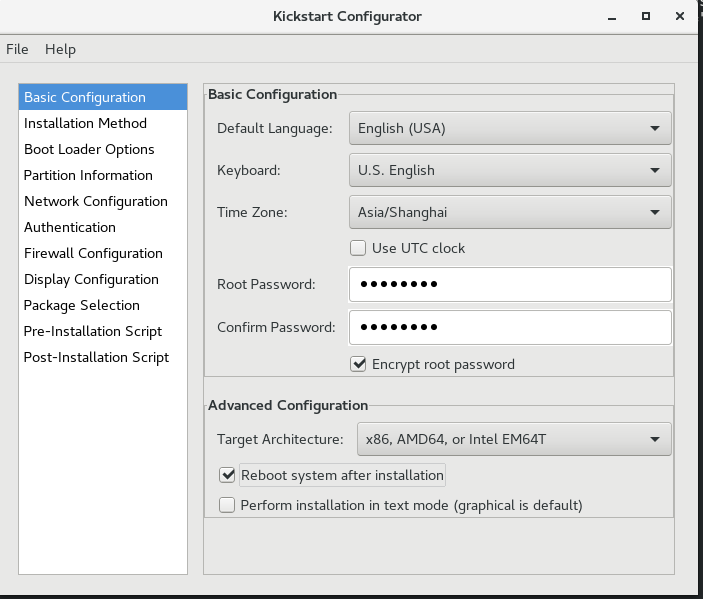
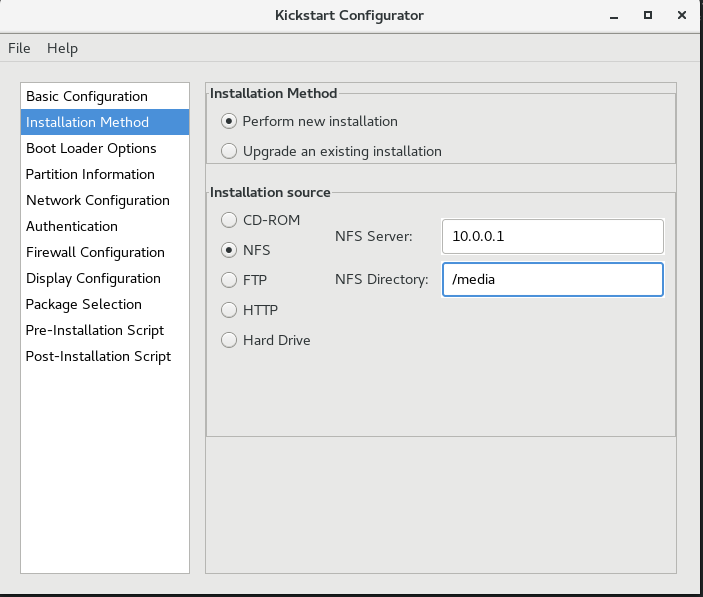
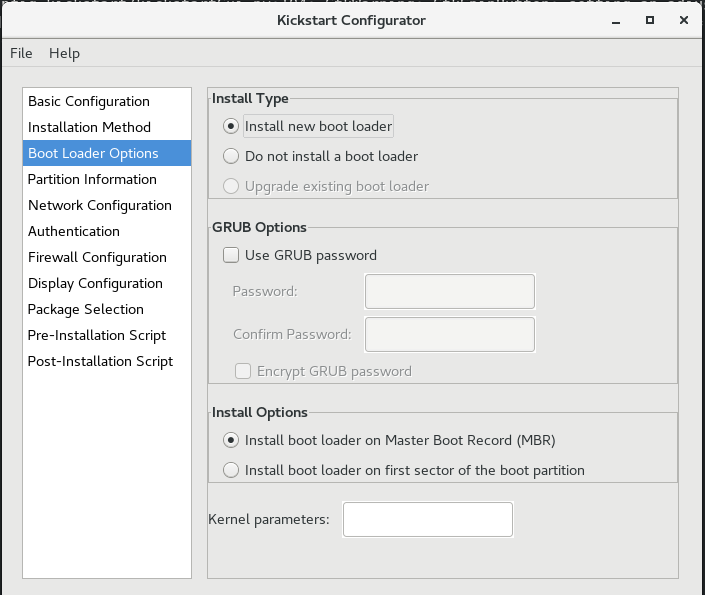
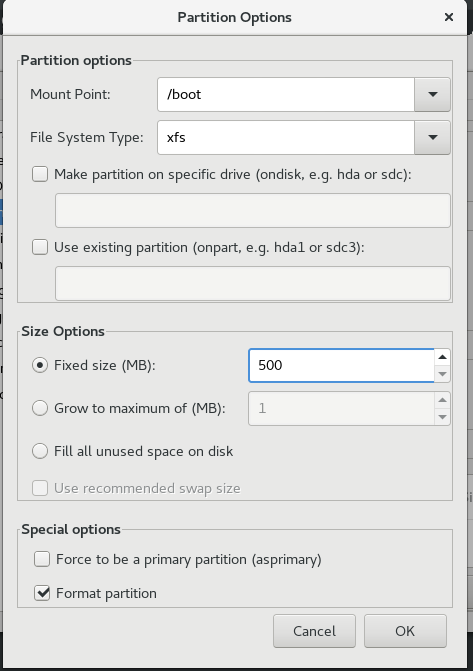
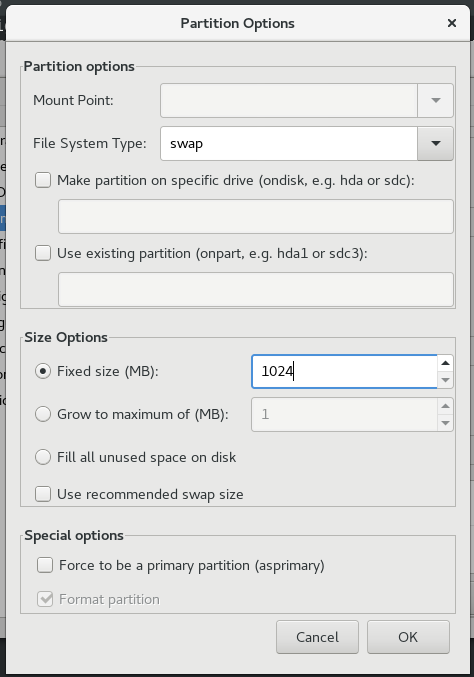
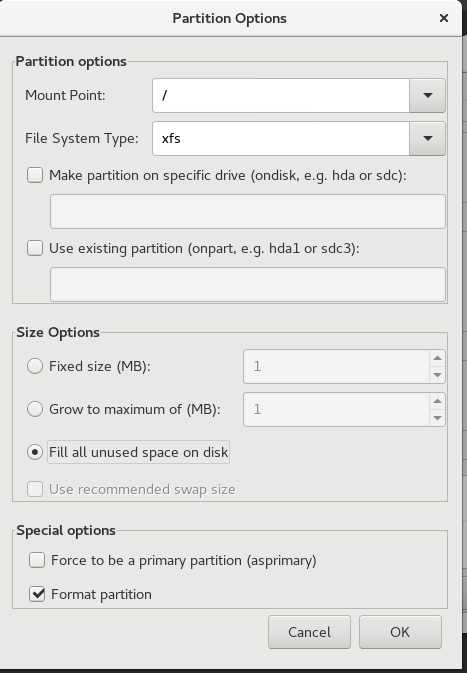
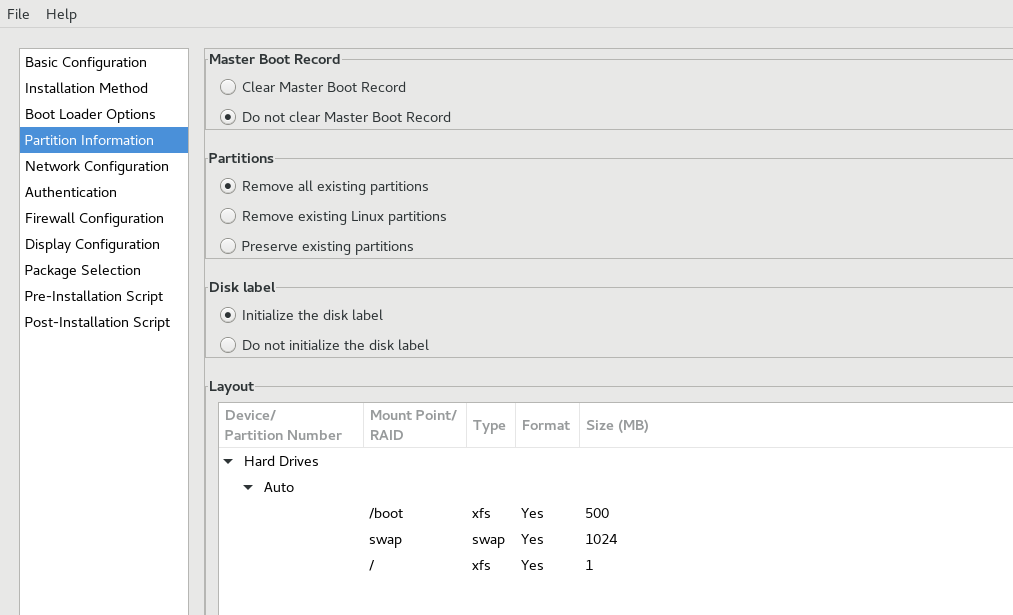

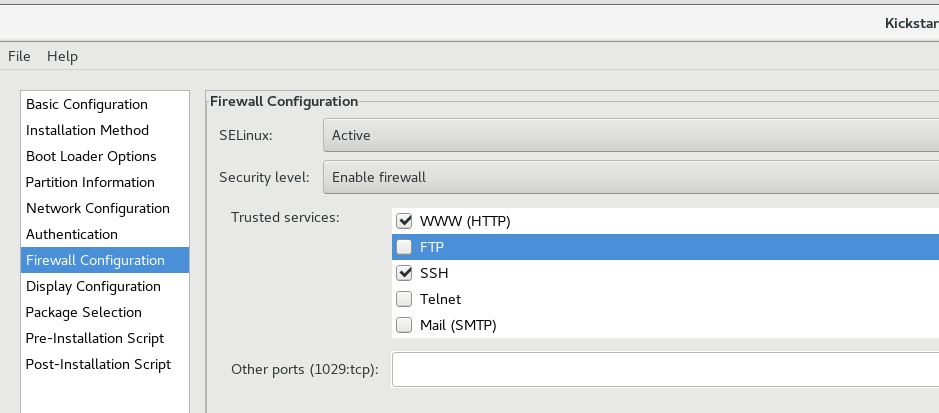
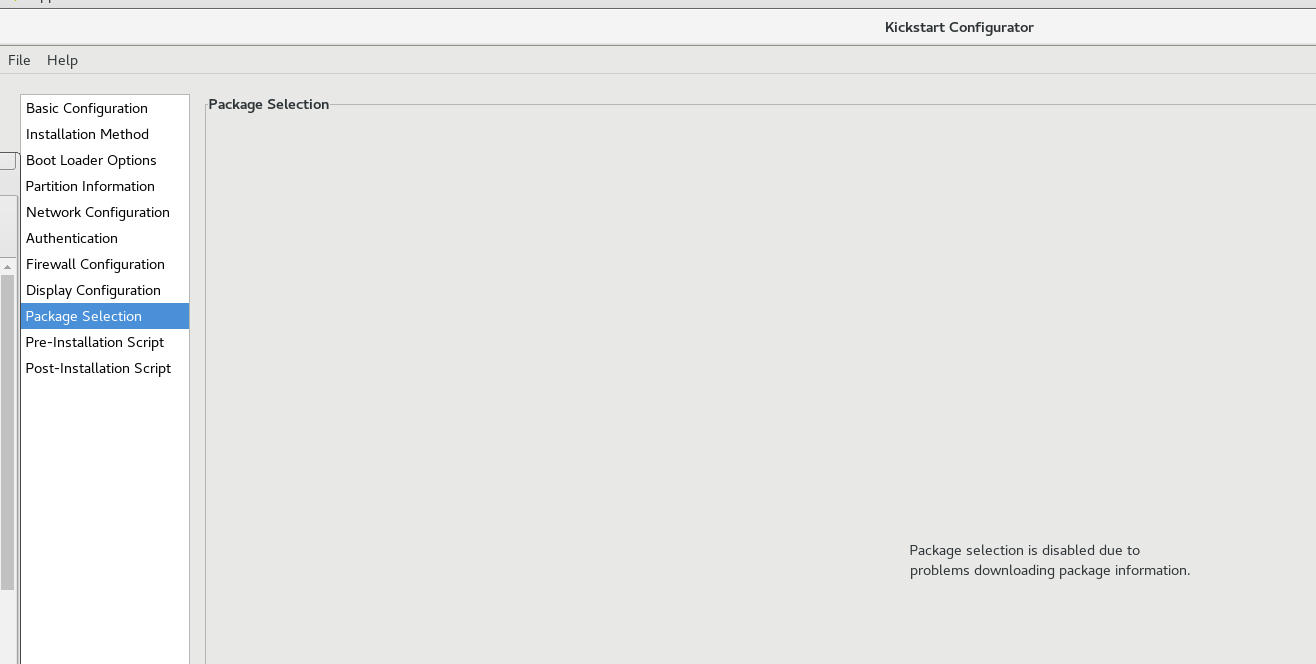
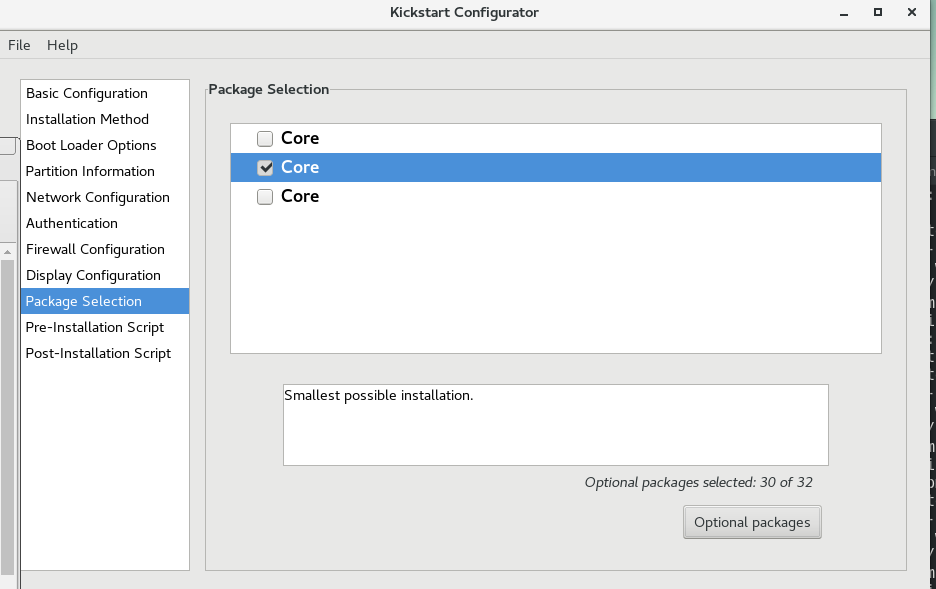
配置完了后保存文件 File->save->ks.conf
我的配置文件如下:
#platform=x86, AMD64, or Intel EM64T
#version=DEVEL
# Install OS instead of upgrade
install
# Keyboard layouts
keyboard 'us'
# Root password
rootpw --iscrypted $1$GxAx/GR0$xrYTJplTJtdpihmIiLXBx.
# System language
lang en_US
# Firewall configuration
firewall --enabled --http --ssh --service=http,ssh
# System authorization information
auth  --useshadow  --passalgo=sha512
# Use graphical install
graphical
firstboot --disable
# SELinux configuration
selinux --enforcing

# Use NFS installation media
nfs --server=10.0.0.1 --dir=/media
# Network information
network  --bootproto=dhcp --device=eth0
# Reboot after installation
reboot
# System timezone
timezone Asia/Shanghai
# System bootloader configuration
bootloader --location=none
# Partition clearing information
clearpart --all --initlabel
# Disk partitioning information
part /boot --fstype="xfs" --size=500
part swap --fstype="swap" --size=1024
part / --fstype="xfs" --grow --size=1

%packages
@core

%end
配置NFS
yum-y install nfs-utils rpcbind
systemctl enable nfs
systemctl start nfs
直接修改NFS配置即可
mkdir /ks
vim /etc/exports
配置如下:
/ks 10.0.0.0/255.255.255.0(ro)
/media 10.0.0.0/255.255.255.0(ro)
挂载安装光盘到/media目录
mount /dev/cdrom /media镜像挂载亦可
mount -o loop centos7.iso /media设置网卡静态IP,这里我的网卡名称是ens36
nmcli connection modify ens36 \
connection.autoconnect yes \
ipv4.method manual \
ipv4.addresses 10.0.0.1/24 \
ipv4.gateway 10.0.0.1 \
ipv4.dns 10.0.0.1
这样既可将网卡设定为静态IP,以方便DHCP服务启用
nmcli connection up ens36
nmcli connection show ens36
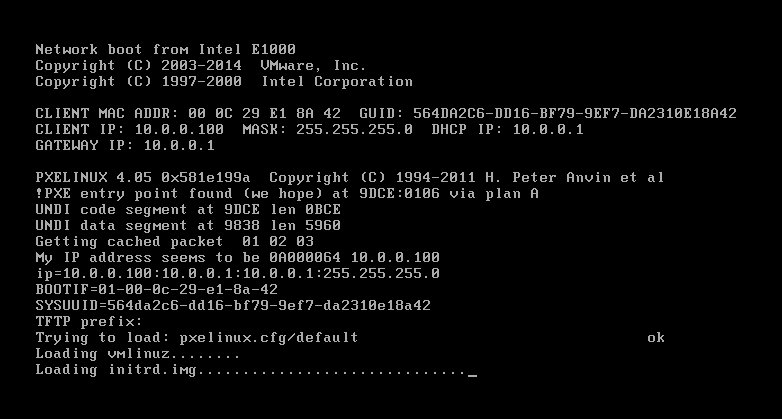
重启DHCP服务后,使用PXE启用一台机器查看吧!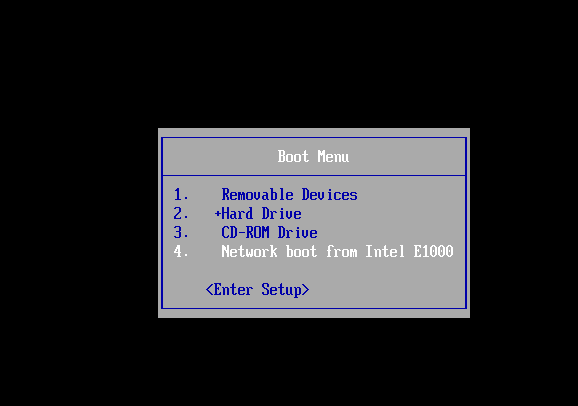

仅有一条评论
(评论关闭)偶然看到一个WDS+MDT部署win的,记录下地址https://www.dadclab.com/archives/4877.jiecao